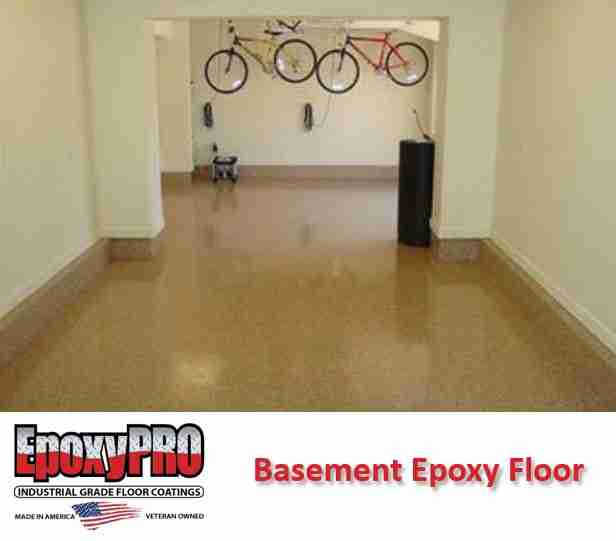
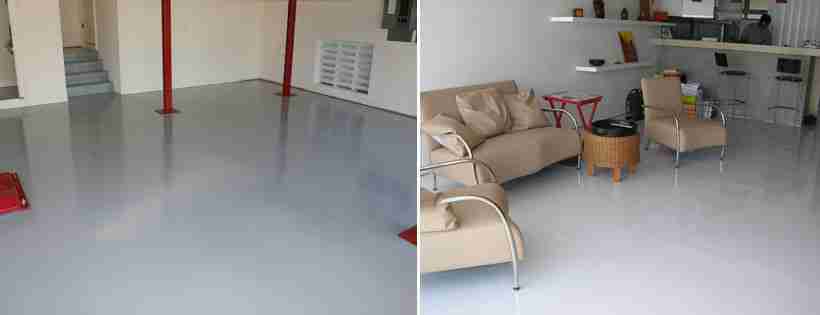
METALLIC Epoxy Basement Floor Paint Floor Paint Coating System: with 24 beautiful colors in our metallic color chart to choose from you are sure to find the perfect, light reflective marbleized color in which to begin your basement’s amazing transformation. It also looks fantastic in your Garage. If your are doing your Garage floor click here for more information.
From a monochromatic aesthetic, to a natural or rustic feel, or to a modern feel you can’t go wrong with either choice. Both systems will aesthetically enhance your new and easy to clean basement living space. With EpoxyPRO floor paint coating systems creating an exciting and new extended living space for your family and friends is easy.
Now let’s talk about important stuff that should be addressed while in the process of contemplating the preservation, restoration or remodelling of your basement floor project, like the fact that basement floors tend to retain moisture due to hydro static pressure that is underground where moisture levels are highest due to the colder temperatures and the concrete floor being located directly on top of soil where any nearby water levels may feed into and settle into the environment beneath the surface. Because of the possibility of moisture lurking underneath, which really, is a most likely occurrence rather than not, the moisture factor of an unsealed basement floor will draw in water and can create all kinds of problems. If a moisture factor is prevalent in your basement concrete floor you can usually tell by visually seeing signs of wetness and/or damp areas, or by a musty mildew smell. EpoxyPRO recommends that you do a moisture test on your basement concrete floor to determine how to mitigate any existing moisture before any epoxy floor paint application.
Sealing your basement’s concrete flooring is a SMART thing to do! Without an epoxy sealant on your concrete basement floors mold and mildew can still grow, but once carpeting, vinyl, tile, or any other flooring is laid you won’t be able to see it right away. Not only will the growth of hidden mold and mildew quickly ruin your flooring, but if it is unseen and left unchecked it may also spread onto other objects. Most any surrounding objects such as toys and furniture are vulnerable targets of mold and mildew, but most of all, if mold and mildew should become airborne the rapid growth of mold contamination may also pose some very serious health risks. So, be SMART, if you plan to install carpet, wood, tile, or other flooring, we highly recommend that you create a moisture barrier before installing the flooring of your choice by sealing your concrete basement floor with an EpoxyPRO floor paint coating system. But, with EpoxyPRO Floor Paint Coating systems you are, “One and Done!” So, other than the use of optional and cleanable area or throw rugs no other expense is necessary as your EpoxyPRO epoxy floor paint can last a lifetime.
Seal your basement floor with Epoxy PRO’s non-porous industrial & food grade, anti-microbial 100% solids industrial grade epoxy to help prevent mold and mildew from forming.
Using Epoxy PRO floor paint coating system to seal and protect your concrete basement floor. As we are selling best best concrete floor paint for basement. Epoxy PRO is a smart product to eliminate dust, non-porous, maintenance free and makes cleaning your floor easier.
Epoxy PRO floor paint offers many advantages over other flooring options. Our epoxy is a water-proof, rust-proof, two-part floor coating system that will not stain when exposed to most substances and has been widely used for many decades on industrial and commercial floors because of its durability and strength in protecting concrete substrates from wear and tear from high volume motorized traffic and harsh corrosive contamination such as acid, oils, chemicals, and excessive heat.
These destructive elements in our daily environments are the reasons why epoxy floor coatings are now popular, not just for painting garage floors, but also for painting basement floors, industrial floors, and outdoor living areas like covered patios, enclosed porches, laundry rooms, workshops, pole barns, etc.
1 complete kit will cover up to 500 square feet (with a smooth, non-porous concrete substrate).
INCLUDED IN EACH 100% SOLIDS EPOXY KIT:
- 3-Gallon; 2-Gallons Part A & 1-Gallon Part B
- 5-Gallon Mix Bucket
- Notched Squeegee
- Mix Wand
- Easy-to-follow instructions
Steps to Sealing your concrete Basement Floors with Epoxy
Step 1 – start by removing all objects from the area where you are planning to apply your chosen Epoxy PRO Basement Floor Paint coating system.
Step 2 – Using a diamond grinder or concrete floor sander, which can be rented for a nominal fee from your local home improvement store (Home Depot Tool Rental). When you are coating bare concrete: lightly grind to profile the floor area to be coated with Epoxy PRO floor coating system. If concrete has an old or existing surface coating, glue, paint, crack fillers, or other floor adhesive you will need to grind surface until any previous coating is removed and you see the clean surface of the concrete.
Step 3 – Very thoroughly sweep and then vacuum the concrete floor. Vacuuming is recommended.
Step 4 – For best results, if your concrete surface has unfilled surface cracks; thoroughly clean them out the best that you can with a vacuum and using its crevice tool. Or, if your concrete has surface cracks that have old crack filler in them it is best to thoroughly clean them out of any loose material residues and re-patch using our Epoxy PRO Floor Patch product before proceeding with the coatings system. To minimize the appearance of patching apply surface patch with putty tool and scrape surface of cracks as clean and as smooth as possible. Once Epoxy PRO Floor Patch is cured we recommend that you grind and vacuum all patched areas so that the patch work areas do not telegraph or highlight (or appear) in the epoxies finish topcoat.
Step 5 – Use Painter’s Tape to tape off all floor cove base moldings while leaving a 1/16” gap between bottom of tape and the concrete floor surface. It is important to leave the gap so that the tape can be removed easily and it will not get stuck on the cured epoxy paint.
Step 6 – Prepare all the tools and materials as directed in the downloadable “How to apply pure epoxy” data sheet from your epoxy of choice’s products landing page.
Step 7 – Set up a workspace to set up your workstation.
Step 8 – At this point, if utilizing the “epoxy application spiked shoes” attach them onto your shoes now.
- Optional use: you may use a tarp, or a piece of cardboard or a plastic sheet to cover an approximate 6 foot by 6-foot area (6’ x 6’) to use as a workstation floor.
- Set up this floor covering in the area where there is an exit. Such as being in the basement, by the stairs leading upstairs or perhaps if the basement has a walk out access / door wall.
- Position all materials on top of the tarp, cardboard, or plastic sheet floor covering.
- Attach squeegee to extension pole.
- Attach roller cover to roller frame, then attach roller frame onto an optional second extension pole – Keep in mind – that if you are using only one extension pole, that while applying the Epoxy Pro floor paint coating system – be prepared to quickly swap the squeegee tool after squeegee step is completed for the roller frame with roller cover tool and begin roll out step.
Note: Whenever possible, it is recommended to use 2 (two) extension poles, for ease of application. (One extension pole for the squeegee and one extension pole for the roller frame and cover)
You are now ready to start step 1 of the coating process – For best results, refer to all directions carefully as instructed for each floor coating system. You will find epoxy application instructions on either the PURE Epoxy or the METALLIC Epoxy products landing page.


